Words of notice: This is an article has been written by Antoine Cavaillé. Many thanks for their consent to sharing this story here.
Before we begin, check out the first part of the series in case you missed it. It presents the backbone, the base layer of our infrastructure. This second part concentrates on the different components needed by our application to run on Huawei Cloud.
Part 1: Docker Repository
To deploy our application on Kubernetes, we will be using Docker containers. Those containers will need an image to run and we chose to store the images on a Huawei Cloud managed Docker repository called SoftWare Repository for Container or SWR for short. An SWR will store your images and provide an HTTP address to each of them so that you can pull them from your Kubernetes cluster. To upload your newly created image, you can click on the “Upload through client” button in the upper right corner of the Console. The Console will generate temporary credentials for the SWR. You will then be able to tag and push your image like so:
$> docker tag [${IMAGE_NAME}:${TAG_NAME}] swr.${REGION}.myhuaweicloud.com/${ORGANIZATION}/${IMAGE_NAME}:${TAG_NAME}
$> docker push swr.$REGION.myhuaweicloud.com/${ORGANIZATION}/${IMAGE_NAME}:${TAG_NAME}
After that you will see your image on the Console and by clicking on it you will find a link to pull it.

Part 2: Kubernetes Cluster
Deploying and maintaining a vanilla Kubernetes cluster is challenging, that is why Cloud providers have created managed services to handle administration tasks such as master provisioning or rolling updates. The implementation of the Huawei Cloud managed Kubernetes service is noteworthy; it is a mix of Kubernetes, Rancher and Helm repository all implemented at the same place and easy to deploy. First, let’s review the Huawei CCE -Cloud Container Engine- cluster creation.
Cluster creation
After clicking on “Buy CCE cluster” you have a few choices to make:
- The Kubernetes version: 1.15 or 1.17 at the time of writing;
- The number of masters.
One master will be less expensive but your cluster will not be highly available. That is, if your master fails then your cluster will be unreachable. Three masters generally ensures high availability.
You can create a node to link to your Kubernetes cluster but this is optional because there is an interesting feature called NodePool which we will explore later in this part.
After this step you may enable add-ons. Add-ons is a library of Kubernetes packages that can be deployed on your cluster through the Console. You can for instance enable horizontal pod autoscaler or Node autoscaling.
When all these steps are complete, you can create your cluster and move on to node management!
Node management
On your CCE panel, go to Resource Management > Nodepools. This feature allows you to create a pool of nodes of a
certain type and attach it to your Kubernetes cluster. It comes in handy if you want to mix several types of nodes,
isolate workloads on certain machine types using NodeAffinity
or enable node auto scaling to follow your workloads. When your cluster is created and a node pool is attached to it you
can start deploying your Kubernetes resources on it!
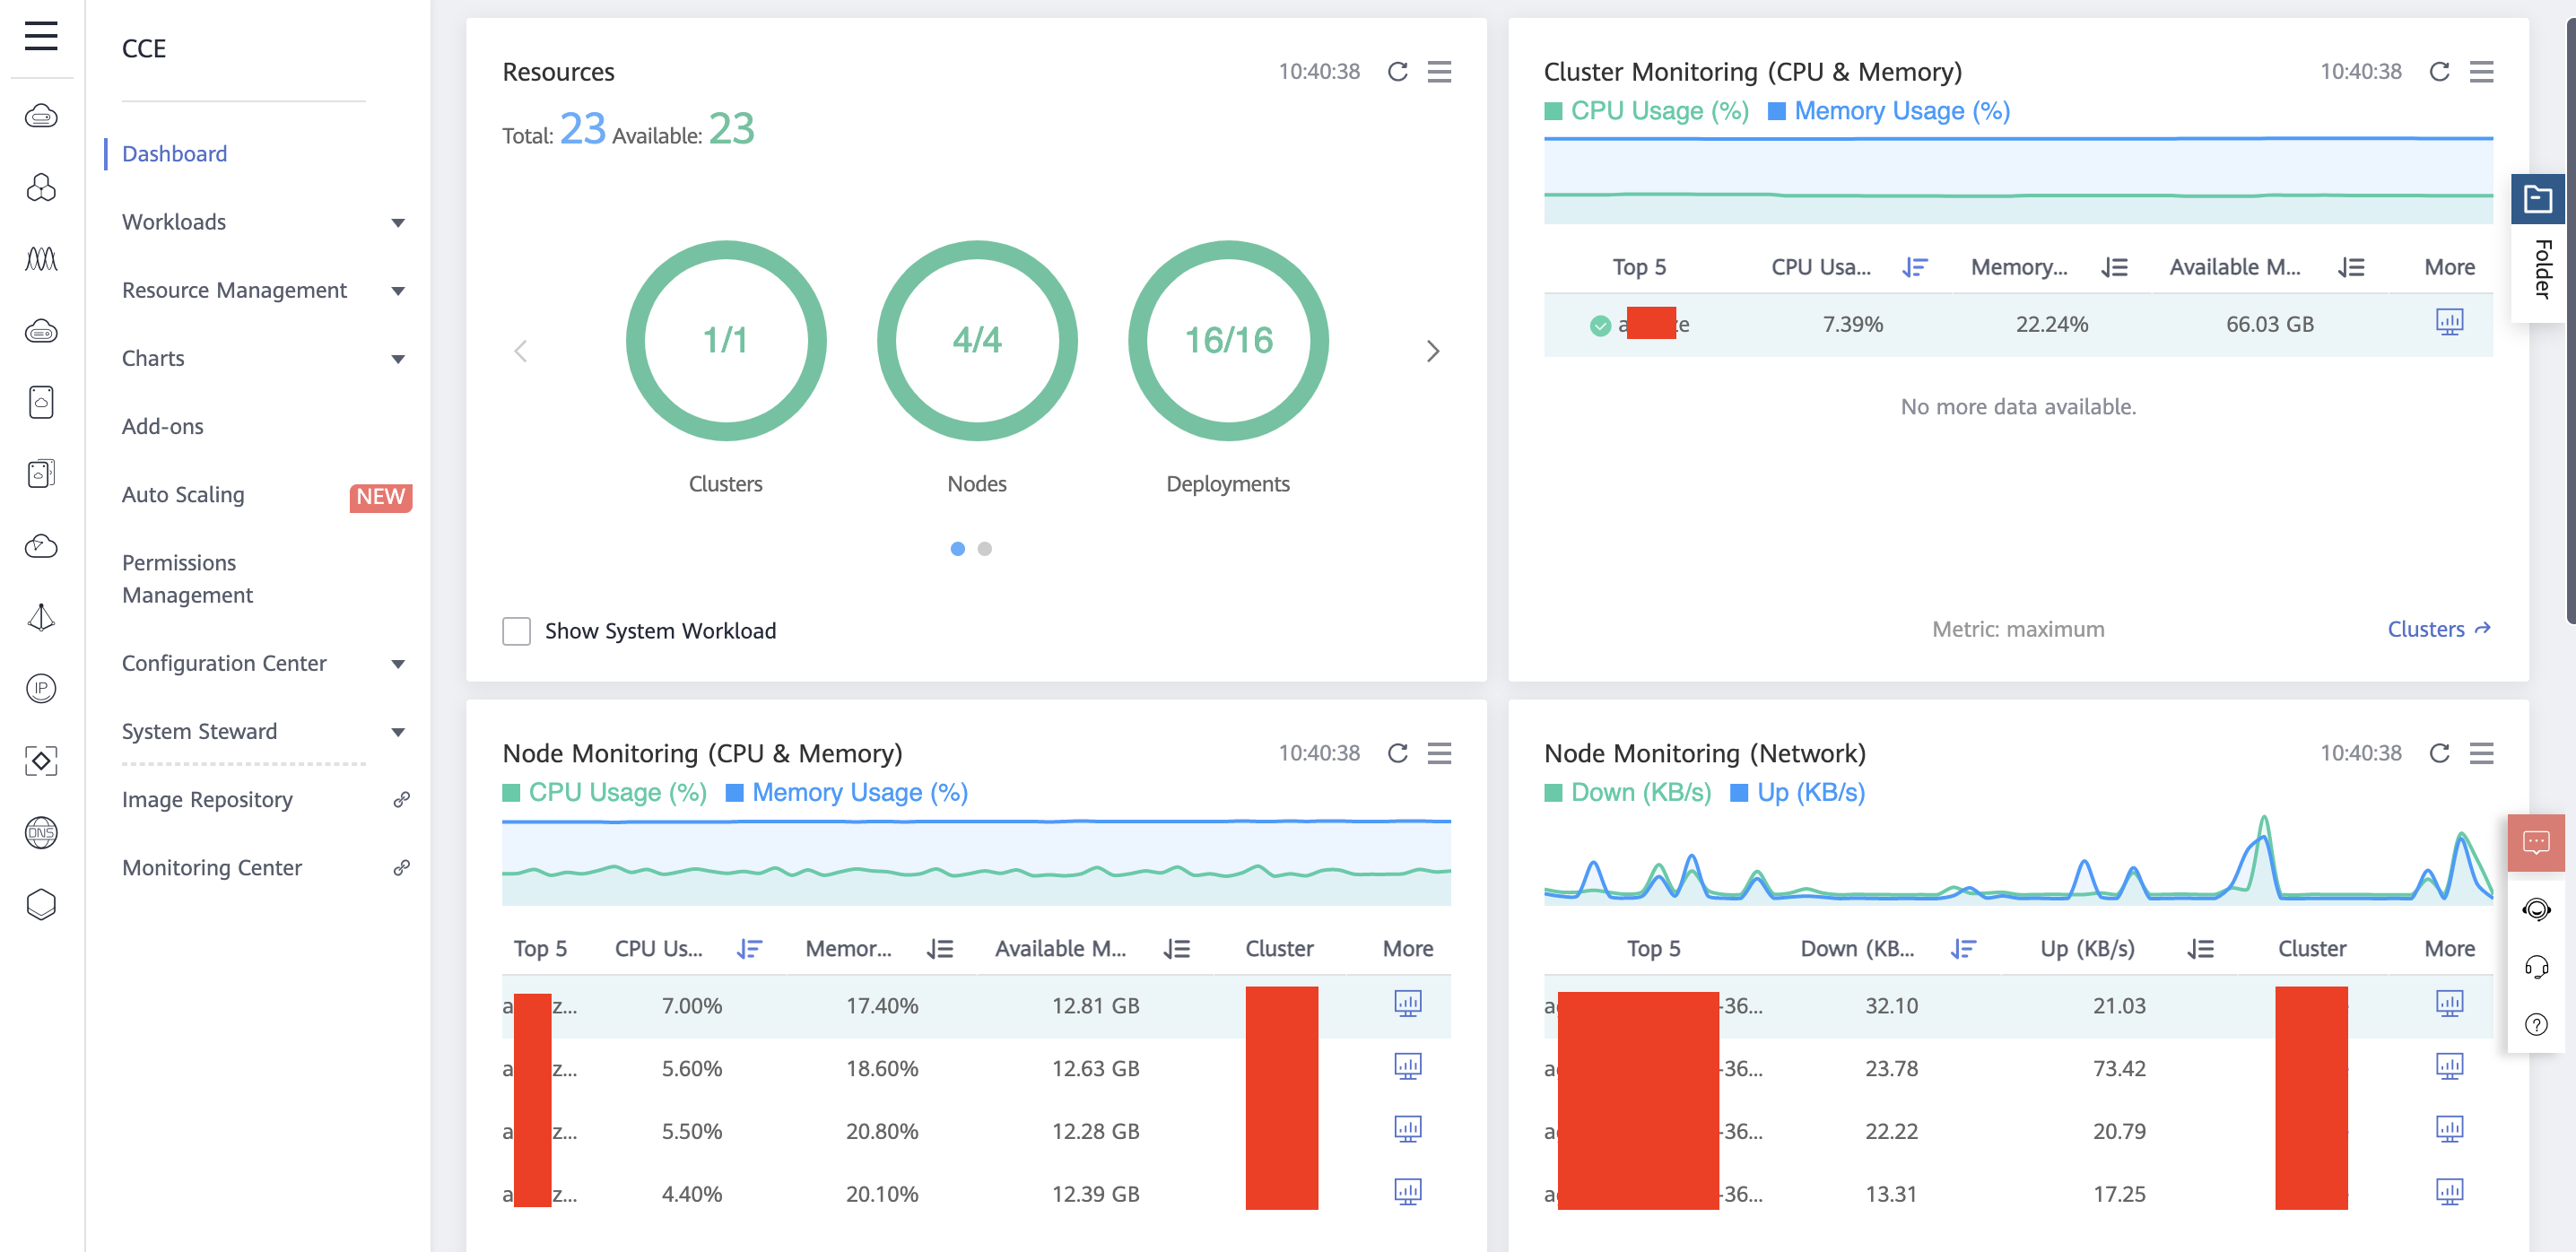
Features
Let’s review the different features the CCE cluster gives us. The Dashboard view offers an overview of the health of your cluster with key metrics like nodes CPU load and network monitoring. It is customizable and works out of the box!
Earlier there was a mention about Rancher. If you go to the Workloads tab you will see your Kubernetes internal resources and will have the ability to create and modify them directly from the interface. This helps when you want to easily debug a deployment or create a test workload from scratch. You can handle Deployments, Services, Secrets, etc.
Then you have the charts tab. This part allows you to integrate Helm charts
into your cluster through the interface. You can use Huawei Cloud sample charts like nginx-ingress and elasticsearch
or even upload yours.
Finally, the System Steward, which was a new concept to me. It provides a unique way to debug your Kubernetes cluster. Basically, the System Steward is a real time monitoring helper for all your nodes, it contains key information akin to Diskpressure, Docker check, Restarted containers etc. Give this a go!
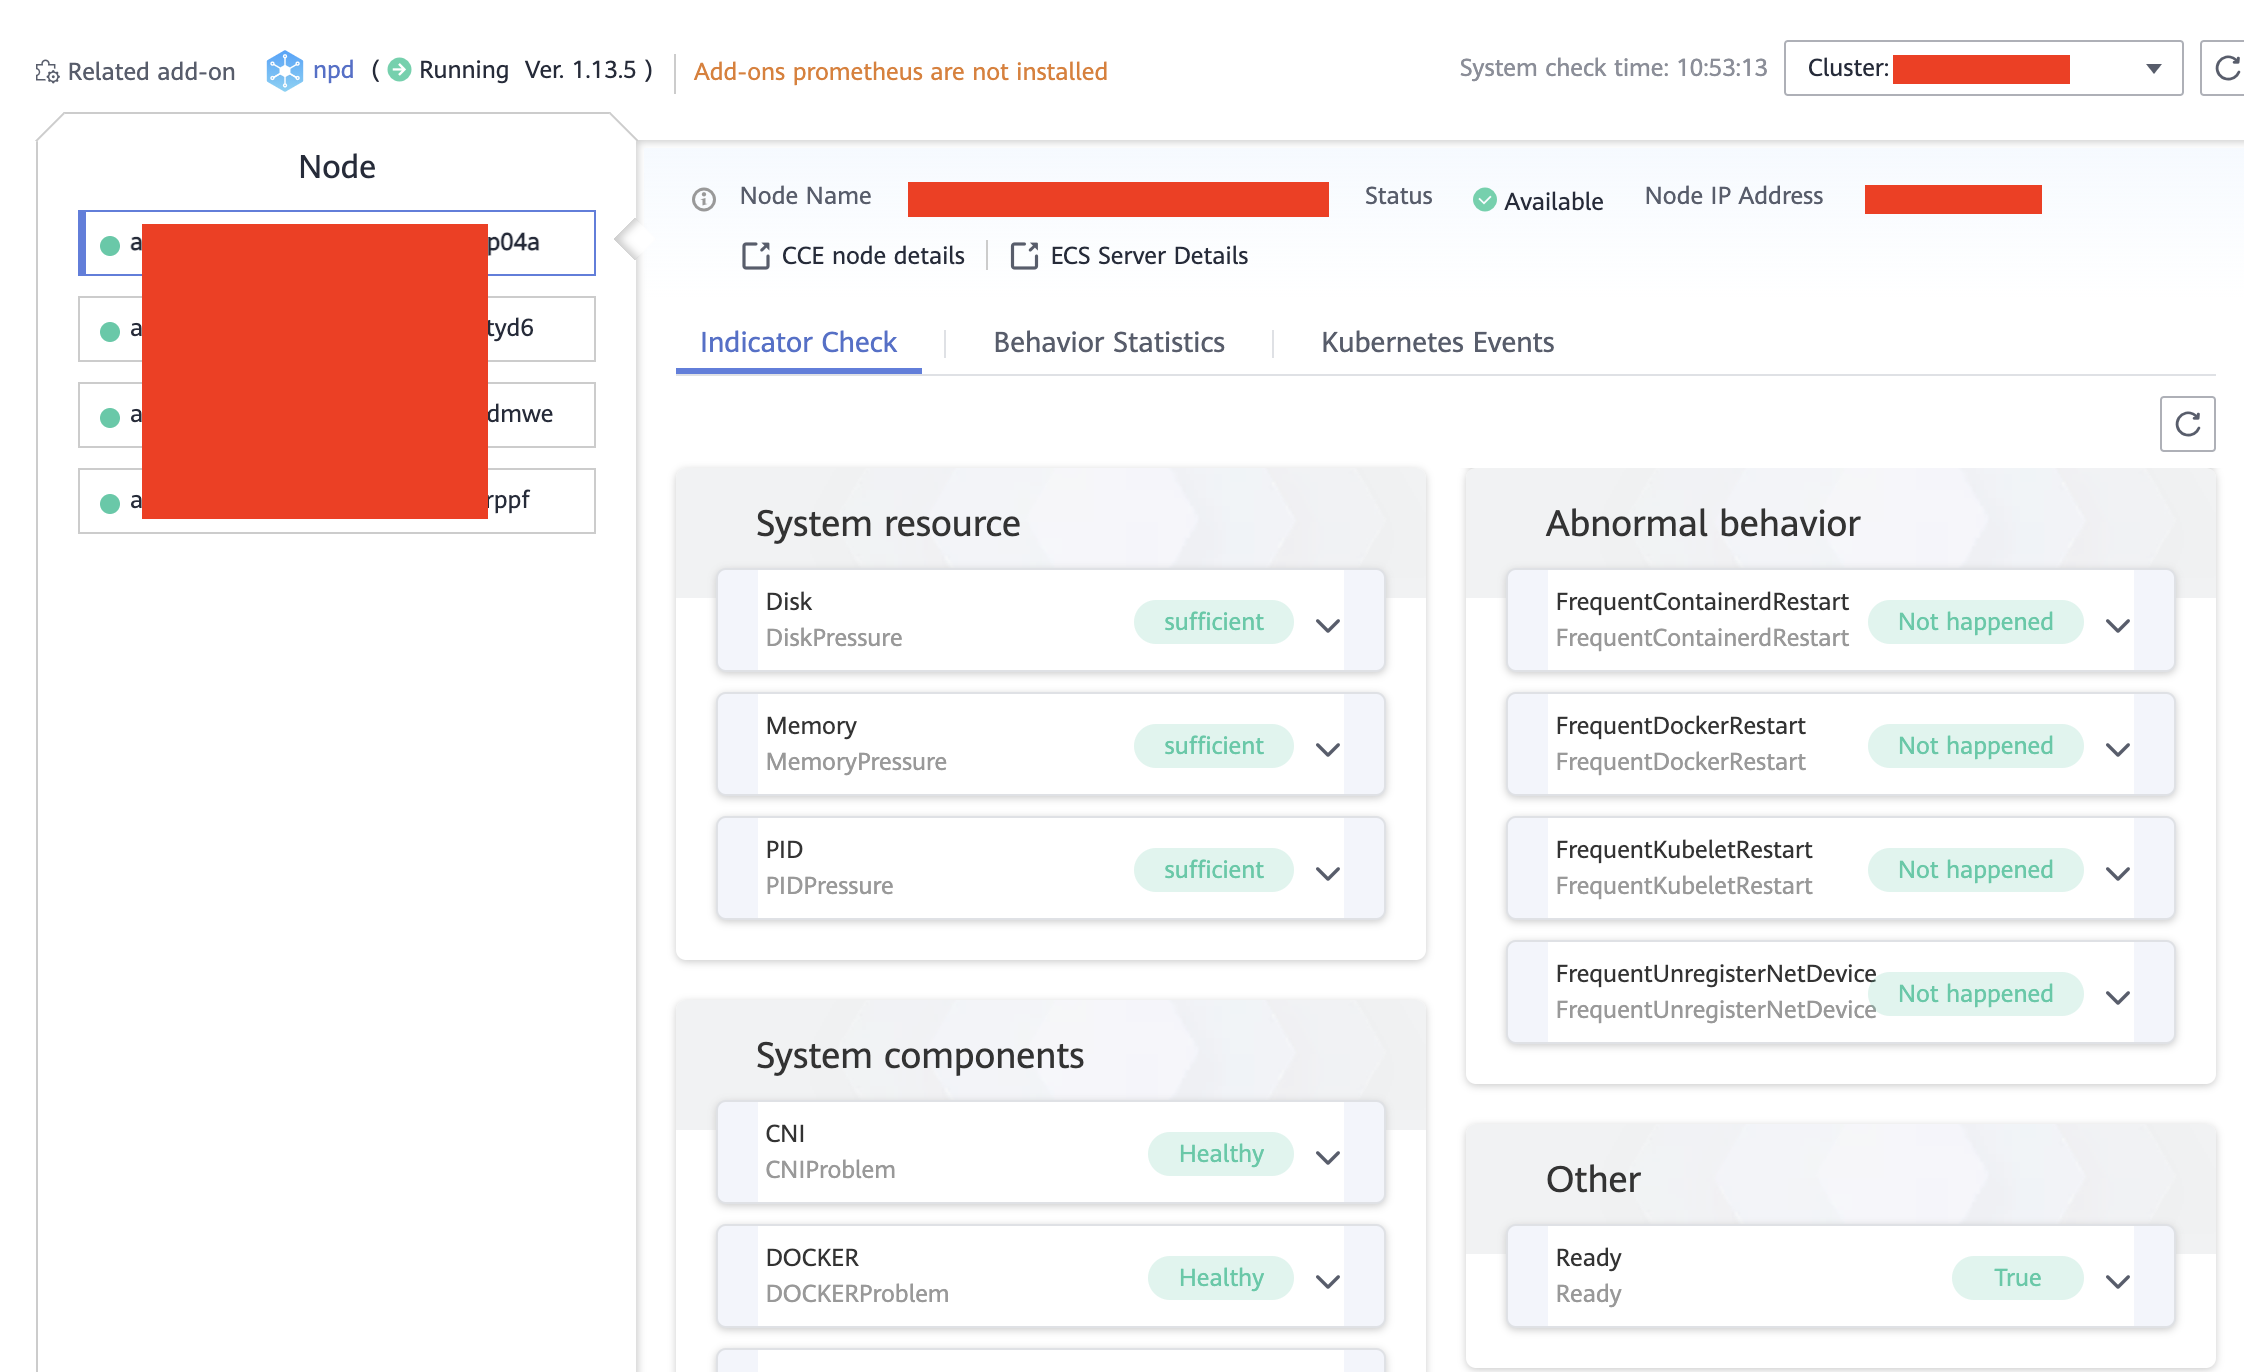
Congratulations, your application can be reached using the IP address of the load balancer and entirely runs on Huawei Cloud managed services!
Conclusion
I have never explored Huawei Cloud before. Here are some of my key learnings:
- Huawei Cloud is complete enough to support most common infrastructure use cases in Asia or South America;
- It is way easier to use and deploy services through the Console than with any other Cloud provider;
- The services are generally less expensive than other Cloud providers and you can use coupons to further reduce your costs;
- Public documentation is lacking and technical support is fast but not free! In other words, if you are stuck then searching your error message will rarely help;
- Infrastructure As Code is not mature enough but the community is actively working on it.
During this project, I only relied on a handful of Huawei Cloud services. It will be well worth your time to discover them all! This project was really interesting, I will definitely follow the evolution of this Cloud provider and encourage you to do so too!